/Signs
(Created page with "Una señal siempre se estructura de la misma forma. La primera línea contiene siempre *cart* o *train* dependiendo si quieres aplicar una propiedad a una sola vagoneta o al t...") |
(Created page with "Las señales pueden ser activadas por Redstone o estas activar la Redstone. <br>Algunas señales pueden requerir ser activadas por Redstone. Algunos ejemplos pueden ser las se...") |
||
| Line 12: | Line 12: | ||
== Redstone == | == Redstone == | ||
Las señales pueden ser activadas por Redstone o estas activar la Redstone. | |||
<br>Algunas señales pueden requerir ser activadas por Redstone. Algunos ejemplos pueden ser las señales de estación (station) o los generadores (spawners). Para activarlos, simplemente necesitas añadirles una fuente de energía al lado de la señal, algunos ejemplos pueden ser el polvo de Redstone (no hace falta que esta esté enfocada a la señal), palancas, botones, antorchas, etcétera. | |||
<br> | <br>Si quieres que la señal esté siempre activo sin la necesidad de añadir Redstone, añade una exclamación (!) o un símbolo de suma (+) adelante de "train" o "cart", resultando en un "[!train]" y "[!cart]" respectivamente. Ten en cuenta que esto también altera el comportamiento de la Redstone. Si se pone una fuente de Redstone al lado de una señal con un + por delante, la señal ignorará la fuente de Redstone y seguirá siempre encendida. En el caso de que se ponga delante de una señal con una !, la señal de Redstone se invertirá. (si se activa la Redstone, la señal se desactiva y si se desactiva la Redstone, la señal se activa.) | ||
<br> | |||
<div lang="en" dir="ltr" class="mw-content-ltr"> | <div lang="en" dir="ltr" class="mw-content-ltr"> | ||
Revision as of 17:45, 24 April 2021
TrainCarts permite añadir acciones en los trenes o vagonetas usando señales.
Estructura y comportamiento
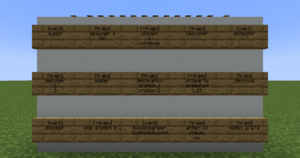
Una señal siempre se estructura de la misma forma. La primera línea contiene siempre *cart* o *train* dependiendo si quieres aplicar una propiedad a una sola vagoneta o al tren entero. Hay que decir que no todas las señales permiten añadir una propiedad a una sola vagoneta.
Redstone
Las señales pueden ser activadas por Redstone o estas activar la Redstone.
Algunas señales pueden requerir ser activadas por Redstone. Algunos ejemplos pueden ser las señales de estación (station) o los generadores (spawners). Para activarlos, simplemente necesitas añadirles una fuente de energía al lado de la señal, algunos ejemplos pueden ser el polvo de Redstone (no hace falta que esta esté enfocada a la señal), palancas, botones, antorchas, etcétera.
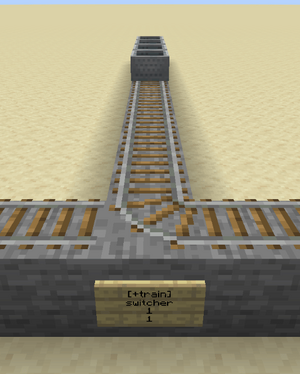
Si quieres que la señal esté siempre activo sin la necesidad de añadir Redstone, añade una exclamación (!) o un símbolo de suma (+) adelante de "train" o "cart", resultando en un "[!train]" y "[!cart]" respectivamente. Ten en cuenta que esto también altera el comportamiento de la Redstone. Si se pone una fuente de Redstone al lado de una señal con un + por delante, la señal ignorará la fuente de Redstone y seguirá siempre encendida. En el caso de que se ponga delante de una señal con una !, la señal de Redstone se invertirá. (si se activa la Redstone, la señal se desactiva y si se desactiva la Redstone, la señal se activa.)
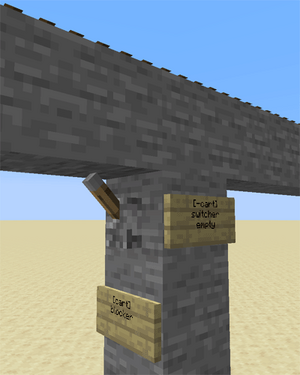
In addition, may a sign also power Redstone, by having a lever attached to the block they are attached to themself. When a specific action is performed (i.e. a Trains stops on top of a station sign) will the lever be activated, allowing the Redstone or Redstone Component to get powered. As mentioned above, would using an exclamation mark before train or cart invert the Redstone state it would give. An active state would not give out any Redstone signal while an inactive will.
You may further change what cart/train is targeted, by adding a colon (:) after either cart or train, followed by one or multiple direction(s). For example, [train:lr] on a switcher sign would activate a lever when a train enters from either the left or right direction and doesn't for the remaining ones.
Depending on the sign can you add further customisation to target specific carts/trains or to perform certain things based on conditions. Please check the sign's specific page to check if it allows such further customisation.
Remote Control
A few sign systems support remote control: the ability to control trains by name. You then use the [train <name>] format, or the shorter alias [t <name>]. Remotely controlled signs only respond to redstone changes, thus where you place them is not important. So far the property, destination, destroy, eject and setblock sign systems support remote control.
Remote control can also affect multiple trains. Just like the tag system, remote control uses *-signs to identify the trains to affect. For example, the following remote control sign will set the destination to home for all intercity trains:
the setblock sign works too!
You can use this to recall all your trains easily. If you use tags to navigate trains, you can also add a tag saying that the train should return. Remote control signs only respond to redstone changes.
Placement
Each sign targets a certain track piece above. Signs attached to walls take the block they are attached to and look up until they find a piece of track. That track is then used for that sign. Sign posts look up until they find a piece of track. There may not be blocks without signs between the bottom sign and the tracks.
You can make a pillar of blocks below a single track piece and attach signs to it, to make a bundle of actions on a single track piece. Trains look down when they enter a new track piece to check for signs, so make sure you put the output signs above the signs that use this output for correct results.
A noticeable exception would be add-ons for the TrainCart plugin, which may change the (relative) position a sign would need to be placed on in order to work for the track. For example, would the TC Hang Rail add-on require you to add the signs above the Hang rail track to work, while the TCC (TrainCarts Coasters) add-on uses the block of a node for the sign, which can be moved to any other block.
For most signs the sign direction influences what happens:
- The train has to face the text on the sign to make the sign respond
- Signs with the same alignment as the tracks (faces to or away from the tracks) always respond
- The train is spawned in the direction the sign faces
Types
- Animator - play an animation configured in the train's attachments
- Announce - sends a message to players in the cart and/or train above
- Blocker - blocks trains coming from a certain direction
- Block Changer - change the block types displayed in a minecart
- Crafter - crafts items inside the storage minecarts of a train using a nearby workbench
- Destination - marks a destination for the path finding and sets the next destination for the train
- Destroyer - destroy trains
- Detector - detect trains on a set region of rails
- Effect - plays a particle or sound effect at the minecart, train or sign
- Ejector - eject trains (let passengers exit)
- Elevator - teleports trains including passengers up and down to another elevator
- Enter - lets nearby players and/or mobs enter the train
- Flip - Lets you flip a cart 180 degrees
- Launcher - launch or brake trains to start moving at a desired speed
- Mutex - acts as a cuboid barrier in which only a single train is ever allowed to be
- Property - set properties on the train such as tags, destinations and owners
- Skip - skips execution of signs up ahead based on statements
- Sound - plays a named sound effect
- Spawner - spawn an entire train, cart types can be set
- Station - stop and launch trains
- Switcher - switch levers and rails based on properties on the train
- Teleporter - teleport trains including passengers (requires MyWorlds)
- Transfer - transfer items between trains and chests/furnaces/dispensers
- Trigger - display train information and a countdown of the arrival time of trains on signs (requires SignLink)
- Ticket - let passengers pay for a ride (requires Vault)
- Waiter - waits the train until the track is clear of other trains
To-do
Add 'chunks' to signs to replace 'keepchunksloaded'.
Permissions
Each sign has a separate build permission. Below the permission nodes for the above sign types:
| Sign | Permission node | Default |
|---|---|---|
| destructor | train.build.destructor | OP |
| ejector | train.build.ejector | OP |
| station | train.build.station | OP |
| property | train.build.property | OP |
| switcher | train.build.switcher | OP |
| transfer | train.build.collector | OP |
| train.build.depositor | ||
| teleport | train.build.teleport | OP |
| spawner | train.build.spawner | OP |
| trigger | train.build.trigger | OP |
| destination | train.build.destination | OP |
| waiter | train.build.waiter | OP |
| crafter | train.build.crafter | OP |
| elevator | train.build.elevator | OP |


