/PathFinding
概要

列車はMinecraftのワールドの中で、Switcherサインの自動分岐を用いていろいろな場所に向かうルートを設定できます。看板を設置することで線路ネットワークのトポロジーが設定され、列車はそれを利用して目的地へと走っていきます。
列車の向かう地点は目的地(Destinations)と呼ばれ、Destinationサインを用いることで作成や設定が可能です。また線路の分岐や終点は線路網のノード(Nodes)で、Switcherサインによって指定できます。ほかにも、Blockerサインを用いることで線路の進行を一方通行に制限でき、線路の交通の流れに逆らったルートが利用されるのを防げます。
やりかた
目的地を設定する
まずは、Destinationサインを用いて目的地となる地点を設定しましょう。サインの三行目にはその目的地の名前を、四行目にはここを通った列車が次にどこの目的地へ向かうかを指定できます。なお、指定は任意で、空行にもできます。
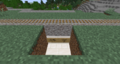
Destinationサインのある駅。列車はここに来た後、三十秒間停止してから、また右へと向かっていきます。

分岐のノードを設定する
レールを分岐させたいところには、常時オンになっているSwitcherサインが必要です。目的地が設定された列車がその上を通るとき、経路が自動で計算され、適切な方向へ分岐します。
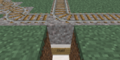
Switcherサインが自動的に行き来の三方向を切り替えます。

一方通行にする
もし線路の一方向からだけ列車の通行を許可したいときには、常時オンのBlockerサインを使います。たとえば、方向の逆の線路――つまり対向車線――が二本並んでいるときなどはこの機能を活用できます。経路探索システムは、Blockerサインでブロックされている線路を自動的に無視するようになっています。
![[+train:left]で左から来る列車がブロックされ、右から左へと通っていく列車だけ許可します。同様に、[+train:right]で逆のこともできます。](/thumb.php?f=Pathfinding_Blocker.png&width=120)
[+train:left]で左から来る列車がブロックされ、右から左へと通っていく列車だけ許可します。同様に、[+train:right]で逆のこともできます。
![[+train:left]で左から来る列車がブロックされ、右から左へと通っていく列車だけ許可します。同様に、[+train:right]で逆のこともできます。](/p/File:Pathfinding_Blocker.png)
試してみる
Place down a minecart on the track, and use the Destination command to set a destination:
/train destination [name]
/train destination output
Now give the minecart a push towards the switcher sign, and observe how it will automatically switch the track to send the train towards the destination. You can change the destination again and send it to the switcher again. Continue to experiment with multiple switchers, blockers and destinations.
If you run into a problem where the switcher appears to make a mistake, use the Reroute command to force a recalculation of all routing information:
/train reroute
It is also possible to use the property sign to set a destination:

Advanced
Once the basic system is understood, there are some more complicated features to discuss.
Useful Side-Features
Keep Chunks Loaded
Prevent trains unloading when no player is nearby or in the train, by enabling the train keep chunks loaded property.
You can use this property sign to set it:
Or you can create your train, use /train keeploaded true and save it under a saved train name using /train save name. You can then automatically spawn it by this name using the spawner sign.
Wait Distance
To maintain distance between trains and avoid collisions over long stretches, use the wait distance property.
Mutex Zones
Protects intersections against collisions with mutex zones.
Station Routing
Station signs can launch the train into the direction of the next destination.
Debugger

The plugin offers a debug stick with which path finding information can be displayed. Use the stick item to click on rails to show information about the route(s) that can be taken. Sneak (shift) while clicking performs a reroute, which recalculates the track reachable from where you clicked. If you have multiple smaller rail networks, this can be more efficient than executing the global reroute command.
All destinations
Use the following command to get a stick item that displays all destinations reached from a given track:
/train debug destination
The track clicked is followed until a node of the track network is found, after which all routeable destinations are listed. For every destination the total distance to it is listed, and particles are displayed leading into it. If you find that a certain destination is not listed that should be, you can move further along the track clicking occasionally to find where the break is.
A single destination

Use the following command to debug a specific destination:
/train debug destination [destination]
Now when you click on the track, particles are displayed what route is taken to reach the destination. This is useful when debugging a specific destination so no particles are displayed for routes and destinations that aren't relevant to you.
Route Manager
Normally only one destination is set at a time. It is possible to set the next destination to go to on the destination sign itself, but that means you can only have one possible route. With the route manager a list of destinations to visit can be configured, and then applied to trains. Trains will then go down this list, advancing it every time they pass by a destination on it.
Commands
First, edit a train, then use the following commands to set a list of destinations:
/train route set [destination1] ([destination2] [destination3...])
/train route set outpost hillfort dungeon

To add additional destinations to the existing route, or to remove them, use these commands:
/train route add [destination1] ([destination2] [destination3...])
/train route remove [destination1] ([destination2] [destination3...])
You can then use the destination command or property to start the route at a desired destination. Otherwise, the route is started from the beginning the moment the train hits a destination sign. To inspect the route of a train, use the base route command. The current destination the train has is highlighted green.
/train route

Persistence
The route of a train can be saved globally under a name so it can later be applied to other trains instantly.
/train route save [name]
To load a saved route, this command can be used:
/train route load [name]
Alternatively, it can be done using a property sign as well: