TC插件/自动寻路
简介
我们可以通过TC插件的switcher、blocker和destination控制牌的相互配合,实现一个复杂的铁路系统,让不同列车前往不同的目的地。在本页面中将介绍自动寻路系统的工作原理以及配置方式。
TC插件可以在路网中设定路径点,同时通过列车自身的路径点属性将列车导向不同的方向。配置路径点的信息请参阅此界面。在路网中,道岔以及路径点的位置被称为“节点”。为了避免列车冲突,路阻控制牌能限制自动寻路的方向。
配置方法
设定路径点
首先将destination控制牌放置在轨道下方,在第三行写上这个路径点的名称。第四行可以为经过的列车设置一个新的路径点(这一行可以留空,列车经过此路径点之后destination属性清空)。
设置新的道岔节点
在道岔处放置一个一直激活的switcher控制牌,TC插件会将道岔识别为路网节点。当一列火车驶入道岔时,插件会根据线路情况自动计算出一条路径,并按照此路径切换轨道,把列车引导到对应的轨道上。需要注意的是,这个节点和现实中的道岔并不完全相同。如果给列车设定的路径点在驶入方向的后方,列车会被“弹回去”。
设置单行线路
因为插件在自动寻路时会设定最短路径,但有时候这个路径会造成进路冲突。所以我们需要在某些路段人为规定行车方向。例如,如果我们希望列车在复线轨道上只朝一个方向行驶,这时可以使用blocker控制牌,让插件计算路径时把可能造成反向行车的路径排除在外。
来试试吧
首先,将矿车放在轨道上,然后输入路径点指令来为其设置一个路径点:
/train destination [路径点名称]
/train destination output
之后,手动把列车推向下方有switcher控制牌的道岔,您现在能观察到插件是如何自动地改变轨道方向,并将列车调度到不同轨道上的。同样,您可以继续使用之前提到过的命令为列车设置新的路径点,然后再将它们推向道岔,重复观察自动寻路系统的运作机制。当您熟悉了以后,您可以在轨道上加入更多的switcher,blocker和destination控制牌并进行大规模试验。
If you run into a problem where the switcher appears to make a mistake, use the Reroute command to force a recalculation of all routing information:
/train reroute
It is also possible to use the property sign to set a destination:

高级功能
上面介绍的是基础功能,接下来还有更多高级功能值得我们讨论。
Useful Side-Features
Keep Chunks Loaded
Prevent trains unloading when no player is nearby or in the train, by enabling the train keep chunks loaded property.
You can use this property sign to set it:

Or you can create your train, use /train keeploaded true and save it under a saved train name using /train save name. You can then automatically spawn it by this name using the spawner sign.
Wait Distance
To maintain distance between trains and avoid collisions over long stretches, use the wait distance property.
Mutex Zones
Protects intersections against collisions with mutex zones.
Station Routing
Station signs can launch the train into the direction of the next destination.

故障处理
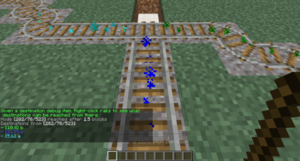
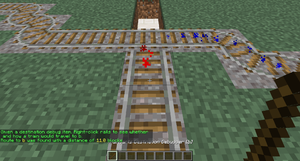
TC插件提供了可以在游戏界面显示路径信息的"调试棒"。手持调试棒右键轨道,轨道上方就会为每条路径生成不同颜色的粒子效果。当潜行时手持调试棒右键轨道,插件就会重新计算以点击位置为起点,前往各个可达路径点的路径。如果服务器中有多个小规模铁路网络,这么做可以比手动输入/train reroute更有效率,因为这个指令是将全地图的整个路网都重新计算一次。
所有路径点
Use the following command to get a stick item that displays all destinations reached from a given track:
/train debug destination
The track clicked is followed until a node of the track network is found, after which all routeable destinations are listed. For every destination the total distance to it is listed, and particles are displayed leading into it. If you find that a certain destination is not listed that should be, you can move further along the track clicking occasionally to find where the break is.
单一路径点
Use the following command to debug a specific destination:
/train debug destination [destination]
Now when you click on the track, particles are displayed what route is taken to reach the destination. This is useful when debugging a specific destination so no particles are displayed for routes and destinations that aren't relevant to you.
路径管理
Normally only one destination is set at a time. It is possible to set the next destination to go to on the destination sign itself, but that means you can only have one possible route. With the route manager a list of destinations to visit can be configured, and then applied to trains. Trains will then go down this list, advancing it every time they pass by a destination on it.
指令
First, edit a train, then use the following commands to set a list of destinations:
/train route set [destination1] ([destination2] [destination3...])
/train route set outpost hillfort dungeon
To add additional destinations to the existing route, or to remove them, use these commands:
/train route add [destination1] ([destination2] [destination3...])
/train route remove [destination1] ([destination2] [destination3...])
You can then use the destination command or property to start the route at a desired destination. Otherwise, the route is started from the beginning the moment the train hits a destination sign. To inspect the route of a train, use the base route command. The current destination the train has is highlighted green.
/train route
Persistence
The route of a train can be saved globally under a name so it can later be applied to other trains instantly.
/train route save [name]
To load a saved route, this command can be used:
/train route load [name]
Alternatively, it can be done using a property sign as well:


