/Attachments
m (1 revision imported) |
m (Change external links to Wikipedia into interwiki links) |
||
| Line 3: | Line 3: | ||
'''The Attachment Editor''' is an in-game interactive [[Map Display]] with which individual carts of a train can be customized. | '''The Attachment Editor''' is an in-game interactive [[Map Display]] with which individual carts of a train can be customized. | ||
This menu is used to configure the appearance and behavior of carts, with a [ | This menu is used to configure the appearance and behavior of carts, with a [[wikipedia:Tree structure|tree layout]] | ||
showing the different attachments. Each attachment represents a part of the train, such as a moving entity or a seat designation. | showing the different attachments. Each attachment represents a part of the train, such as a moving entity or a seat designation. | ||
Attachments added as a child to other attachments are positioned relative to the parent. This allows many attachments to be moved | Attachments added as a child to other attachments are positioned relative to the parent. This allows many attachments to be moved | ||
Revision as of 01:29, 26 September 2023
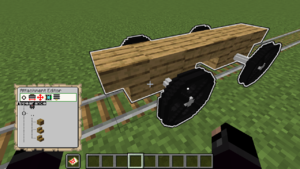
The Attachment Editor is an in-game interactive Map Display with which individual carts of a train can be customized. This menu is used to configure the appearance and behavior of carts, with a tree layout showing the different attachments. Each attachment represents a part of the train, such as a moving entity or a seat designation. Attachments added as a child to other attachments are positioned relative to the parent. This allows many attachments to be moved and animated together as one larger attachment.
Basic usage
Command
To start using the attachment editor, players need to give themselves the map item:
| Command: | /train attachments |
|---|---|
| Permission: | train.command.editor |
Editing
To edit a single cart of a train, and make it visible in the editor, you need to select the cart first.
Each attachment is displayed on a different row, with an indent to the right every time it is added to a new parent. To navigate between attachments, use the Up/Down (W/S) steering controls. For each attachment selected, different menus can be accessed by pressing Left/Right (A/D) and Jump (spacebar) afterwards. Once inside a menu, the sneak button (shift) can be used to exit it again. This behavior is the same for all other menus. To move around while still viewing the editor, it can be placed into the off-hand (typically F).
To add new attachments, duplicate them, change the position in the tree hierarchy, or to delete them, use the General menu denoted by three vertical lines.
Dropping items
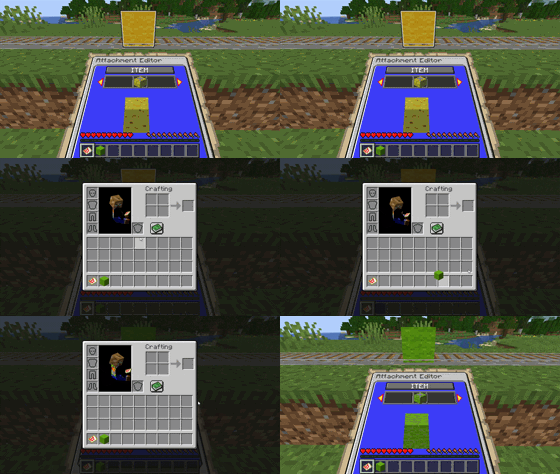
Menus where an item is being configured can be set instantly by dropping an item from the player's inventory. With the menu open, simply open the inventory, pick the item to set, and click on the outside of the inventory to drop it. The drop will be cancelled and the item set in the menu.
Numbers
Number sliders are used to configure numeric values, such position coordinates. Pressing the Left/Right buttons once will increment/decrement a very small amount. Holding the buttons for a longer time causes the number to increment/decrement faster and faster the longer it is being held down.
Text
Text is input using an anvil menu. After typing in the desired text, click on the emerald to proceed, or the barrier item to cancel the change.
Setting using commands
| Command: | /train menu set [value] |
|---|---|
| Permission: | train.command.editor |
Attachment Menu
- Appearance - Configures the type, look and behavior
- Physical - Configures the physical shape and wheel positions of the cart
- Position - Configures the exact position, orientation and movement behavior
Backlog
Editor
-> Navigating the tree menu
- The concept of parent-child node relationships (needs visuals)
- Adding new attachments
- Duplicating attachments
- Deleting attachments
- Reordering attachments

